Adding a Link in Internet Explorer
This page shows how to add a link to SiteBar using a bookmarklet
in Microsoft Internet Explorer. See SiteBar Integration into Internet Explorer for
instructions how to start using SiteBar as an Internet Explorer
favorites manager.
 |
|
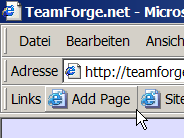
- Check you are currently browsing the Web using Microsoft Internet
Explorer.
- Click the button Add Page to bookmark online the page you
are currently browsing. An Add Link dialog shown below
will be displayed.
- Hint 1: In case you are using the Pop-Up Blocker you might
need to use Ctrl+Click on this button.
- Hint 2: In case you don't see the button Add Page
you need to create a local favorite with a bookmarklet to add
favorites to SiteBar comfortably. See SiteBar Integration into Internet Explorer for
instructions.
|
 |
|
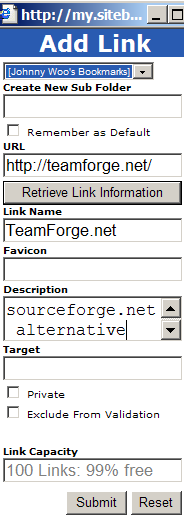
- Parent Folder - select a parent folder where your new
link will be created.
- Create New Sub Folder - enter a name for new subfolder in which
the new link should be created. Leave empty if the new link should be
created directly in the parent folder.
- Remember as Default - check this if you expect to add more links
to this folder soon. Next time a link will be added this parent
folder will be offered again.
- URL - enter an URL of the link you want to add.
- Retrieve Link Information - a button which retrieves Link Name
and Favicon for the URL entered in the URL field. Once
pressed the button disappears (as shown on the picture).
- Link Name - enter a name for the link you want to add.
This name will be displayed in SiteBar.
- Favicon - a favicon's URL.
- Description - for each link a description can be entered. This
description is shown instead of URL when a link is pointed by the
mouse.
- Target - a target on the linked page can be entered. Leave this
field empty if you don't want the browser to scroll to a specific
location on the bookmarked page.
- Private - links that are marked as private will not be shared
even if they are in a shared folder.
- Exclude from Validation - if you have some password protected or
Intranet links, then you should tick this on. Validator will then
skip those links and will not mark them as dead.
- Link Capacity - this field is read only, a maximum number of
allowed links depends on the SiteBar membership you have chosen.
- Press button [Submit].
|
If you need more information, you may use technical SiteBar Help
or visit help forum. Questions and suggestions
related to my.sitebar.org or this
website send directly to the administrators.
